Table of Contents
Handheld barcode scanners

This mini tutorial will cover how we use barcode scanners. This isn't necessarily an Arduino project, but it is a tool that we use every day when shipping packages - instead of entering in invoice numbers, we use a barcode scanner. That way we don't have to worry about humans making typos!
This kind of scanner connects via USB to a computer and has a laser/sensor with a rotating mirror, the laser constantly scans in front of the opening, so its very easy. There are also less expensive wand types where you have to 'stroke' across the barcode (such as the old cuecat) and more expensive 2D rotating ones such as those at checkout counters where you can have the barcode rotated and it doesnt matter.

So far we've been very happy with this type. The exact model is the Motorola/Symbol LS2208 which will cost somewhere between $50-$150 depending on the extras and whether its new or used. Ebay has tons so if you are willing to take a little risk that can be a good place to pick up one.
Cable connection
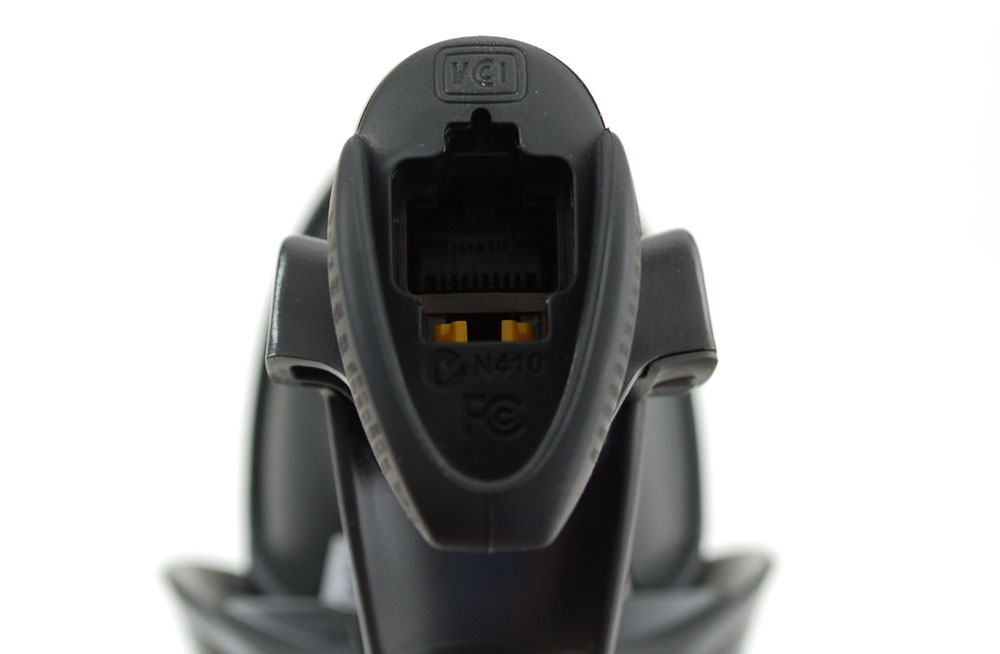
Because these scanners are used for so many industries: checkout counters, manufacturing, inventory, shipping, etc. they are designed to be very configurable and flexible. The first thing you will have to pick out is the cable. The raw scanner doesnt come with a cable instead there is a 'ethernet' port on the back (its not really ethernet, it just looks like it) where you can have up to 10 wires come out. These wires carry the different interface wires.
The following interefaces are supported:
- USB (+5V, ground, D+ and D-)
- PS/2 keyboard 'wedge' (goes between keyboard and computer, inserts keypresses)
- RS-232 (+-10V serial)
- IBM 46xx (for point of sale computers, rare for other uses)
For our use, we like USB the most because its the most flexible. However, you may want to use these for an embedded project - say where it connects directly to an AVR/PIC/ARM or whatever, you'll probably want to go with the RS232 interface for the ultra simplicity or PS/2 if you don't mind a little extra parsing
You'll need two things to change the interface, one is the proper cable (you can make your own but its a real pain, you'll probably want to just buy it) and a power supply if necessary. RS-232 requires a power supply, but the others do not.
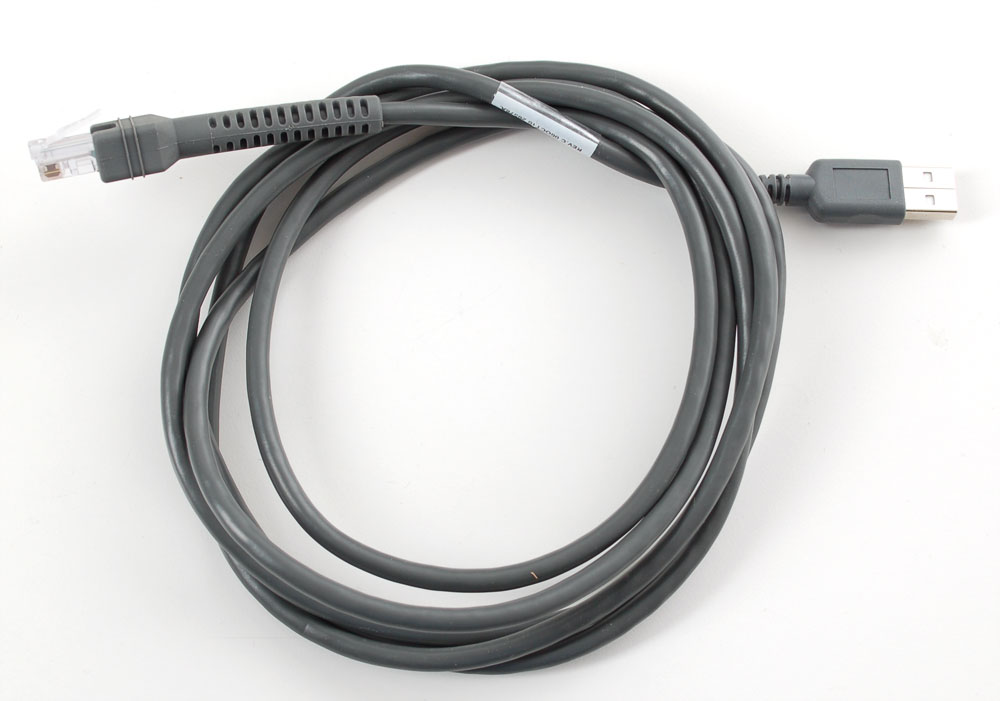
This is the USB cable, for example
Configure
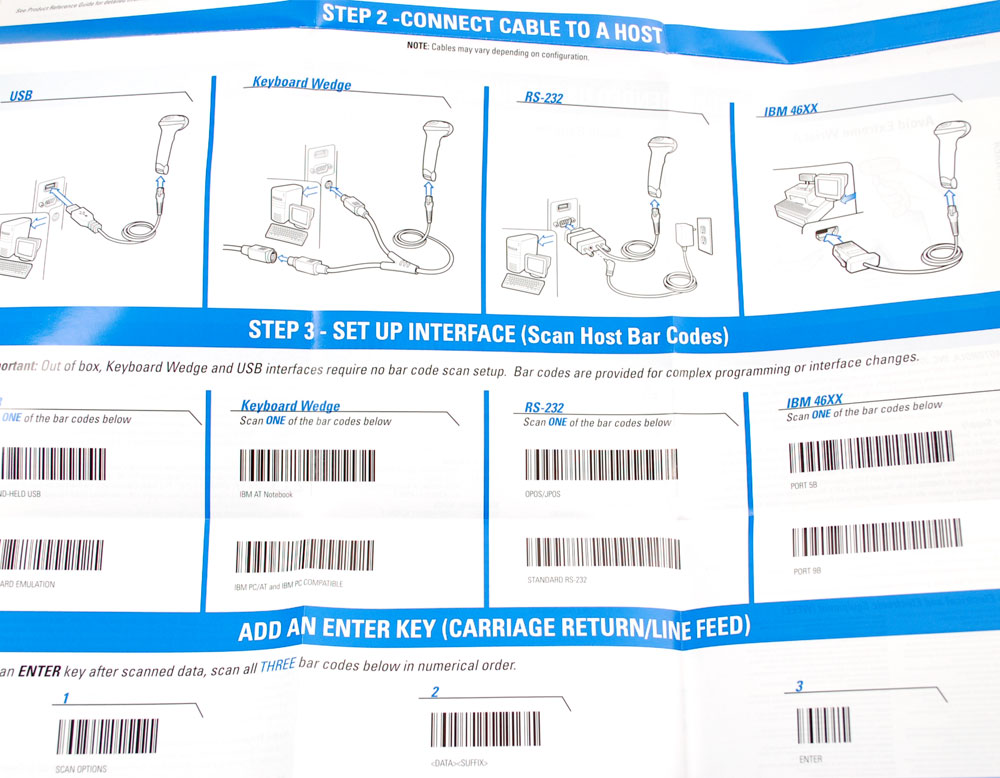
You'll also need to configure the barcode scanner. The way you configure it is very cute, once its powered you scan barcodes from the printed out manual (see Downloads below) to tell it how you are going to use it, what volume the beeper should beep at, etc. etc. If you're using RS-232 you would indicate the baud rate by scanning say the 9600 baud rate in the manual.
USB interfacing
We like USB best for business/work usage because it has power and data and is fairly simple to use. USB can act in two modes:
- HID keyboard mode
- HID raw data mode
As you can imagine, keyboard mode the scanner shows up just as a keyboard and when you scan a barcode it 'types it in' to whatever window you're currently viewing. This is the default mode and its very easy to test and get started.
However, it requires that the user always has the right window up and in the right location for data-entry. For programs with windows, this is a little tough because dialog boxes can pop-up and its easy to click in the wrong place. We like using the raw data mode although its a little tougher to use. In this mode, we literally open up the raw USB connection to the scanner and grab the barcode data directly. This means we can run our scanner software in the background
Neither need drivers for any operating system which is handy.
For more details on raw USB connections, check out our Kinect hacking tutorial
Our code is adapted from this Wiimote project to read Wiimotes accelerometer/sensor data. We only ported the windows part - hopefully someone who is inspired will port the mac/linux version.
You can download our code from our GitHub repo, see the Downloads section below.
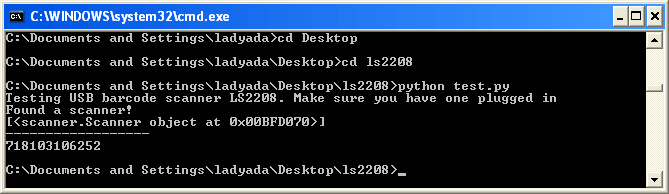
Install Python 2.5, win32file and any other extras you need. Plug in your scanner, open up a command line and run python test.py in the uncompressed folder
Stand
If you are scanning at a desk, it may be convenient to have the scanner in a stand, this way you dont have to press the trigger every time to scan a sheet of paper. We use the stand and then just slide invoices with barcodes underneath the scanner. There's a little magnet in the stand and the scanner detects it to know when it should stay on. There are also powersaving modes if you want, check the manual for the config barcodes

Download
